2D HT Lab 3 Modeling of Diffusion of a Gear Tooth
3.1. Opening Project file
3.2. Adding Operation
3.3. Setting Simulation Controls
3.4. Generating a Database
3.5. Running a Simulation
3.6. Post-Processing the Results
Opening Project File
The DEFORM GUI MAIN window should already be open. With the Gear_Blank.moproj file highlighted in the file list, click on ![]() as shown in Fig. 2DHTML2.1. Integrated Manufacturing Proc. will open.
as shown in Fig. 2DHTML2.1. Integrated Manufacturing Proc. will open.
Adding Operation
Add 2D Forming operation from Operations list in Explorer. Operation can be added by clicking on ![]() button next to 2DForming operation or user can also add the operation by dragging and dropping the operation into Operation Editor region.
button next to 2DForming operation or user can also add the operation by dragging and dropping the operation into Operation Editor region.
Select 3rd operation from Operation editor, Setup type popup will appear, click on ![]() button. Select 3rd operation in Operation editor, double mouse click on it and change the name to “Diffusion “ and press enter from keyboard. (See Fig. 2DHTML3.1.) Click on
button. Select 3rd operation in Operation editor, double mouse click on it and change the name to “Diffusion “ and press enter from keyboard. (See Fig. 2DHTML3.1.) Click on ![]() .
.
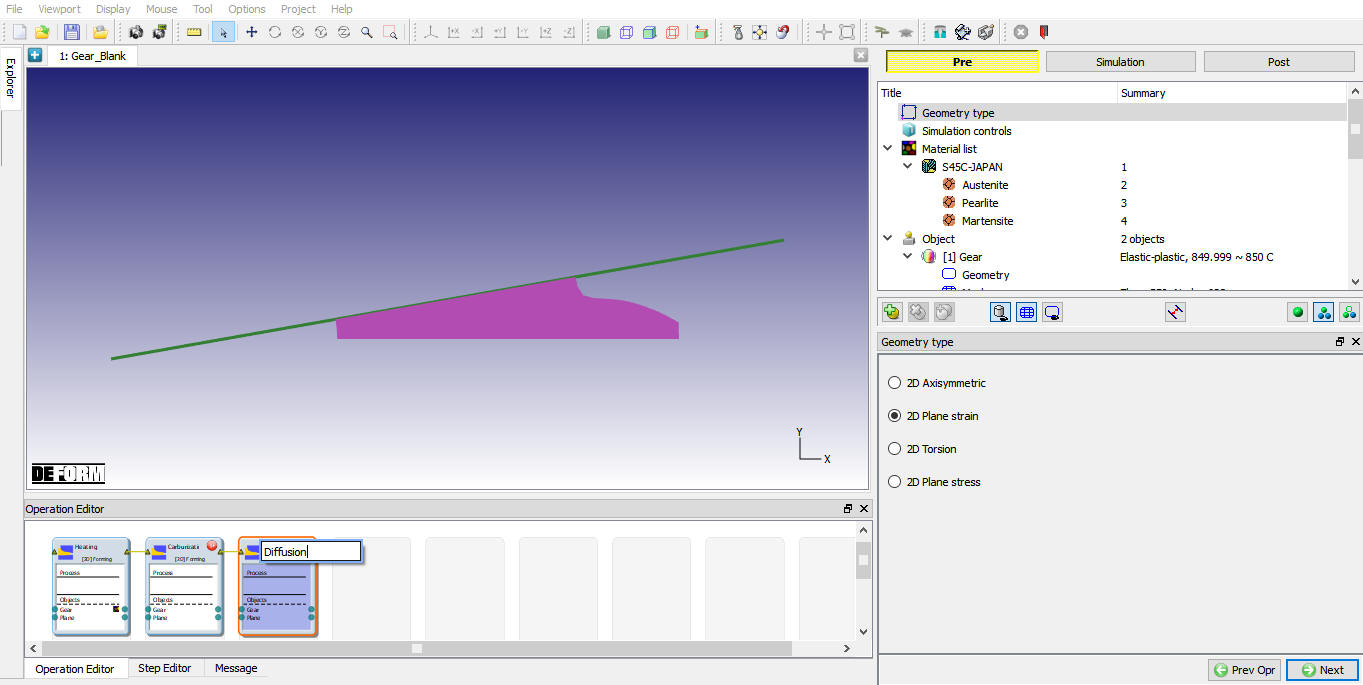
Changing operation name from Operation Editor
Setting Simulation Controls
Select StepIncrement![]() **tab, Set Constant **TimeIncrement to 60 sec as shown in Fig. 2DHTML3.2.
**tab, Set Constant **TimeIncrement to 60 sec as shown in Fig. 2DHTML3.2.
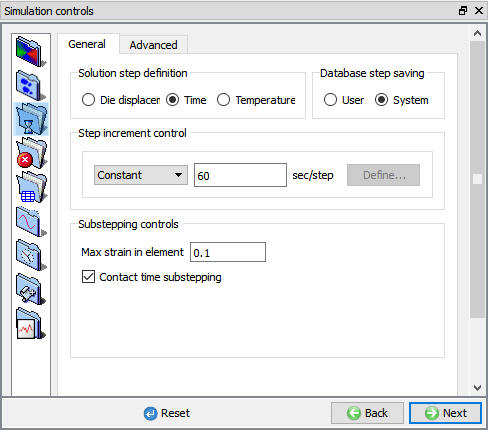
Step Increment tab in expert mode
Select StoppingControls![]() **tab, and set **ProcessDuration to 13200 seconds. as shown in Fig. 2DHTML3.3.
**tab, and set **ProcessDuration to 13200 seconds. as shown in Fig. 2DHTML3.3.

Stopping Controls tab in Expert Mode
Click on the ProcessConditions![]() **tab in the Simulations Controls. Select **Diffusion tab, Set the value of the reaction rate coefficient to 0 mm/s and the environmental atom content should be changed to 0 % atom as shown in Fig. 2DHTML3.4. Click on
**tab in the Simulations Controls. Select **Diffusion tab, Set the value of the reaction rate coefficient to 0 mm/s and the environmental atom content should be changed to 0 % atom as shown in Fig. 2DHTML3.4. Click on ![]() until Generate DB page.
until Generate DB page.
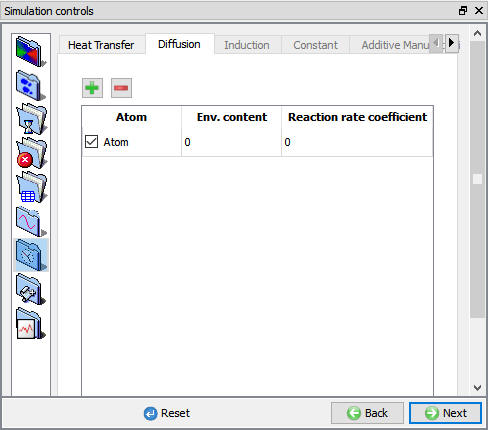
Process Conditions tab in expert mode
Generating a Database
In GenerateDB page. Click the![]() button to have the program check to see if anything was missed in the problem setup. During the checking process, messages in the red color signify data that needs to be fixed before a simulation can be run (such as when you forget to define any material data).If there are no errors shown, then the database can be generated.
button to have the program check to see if anything was missed in the problem setup. During the checking process, messages in the red color signify data that needs to be fixed before a simulation can be run (such as when you forget to define any material data).If there are no errors shown, then the database can be generated.
Click on ![]() button to generate the database (see Fig. 2DHTML3.5.). When the program is done writing the database, switch to
button to generate the database (see Fig. 2DHTML3.5.). When the program is done writing the database, switch to ![]() tab to run simulation.
tab to run simulation.
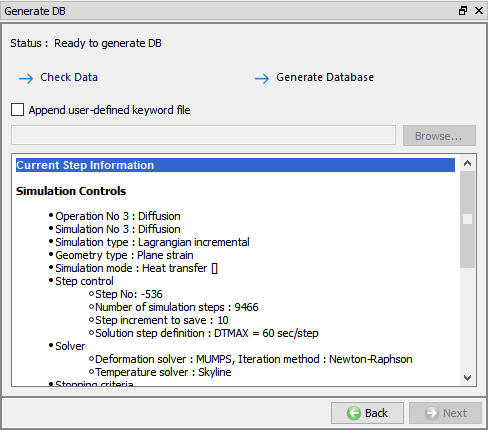
Generate Database window
Running a Simulation
Click on the ![]() action label to open the Run Options dialog. Use the default Continue Run option to select “Continue from the last step ” option and then select the Simulation mode as Interactive and click on
action label to open the Run Options dialog. Use the default Continue Run option to select “Continue from the last step ” option and then select the Simulation mode as Interactive and click on ![]() button to run the simulation. As we click on
button to run the simulation. As we click on ![]() **button simulation starts.
**button simulation starts.
When the simulation is finished without any issues, the following message will be added to the end of the Message file as shown in Fig. 2DHTML3.6.
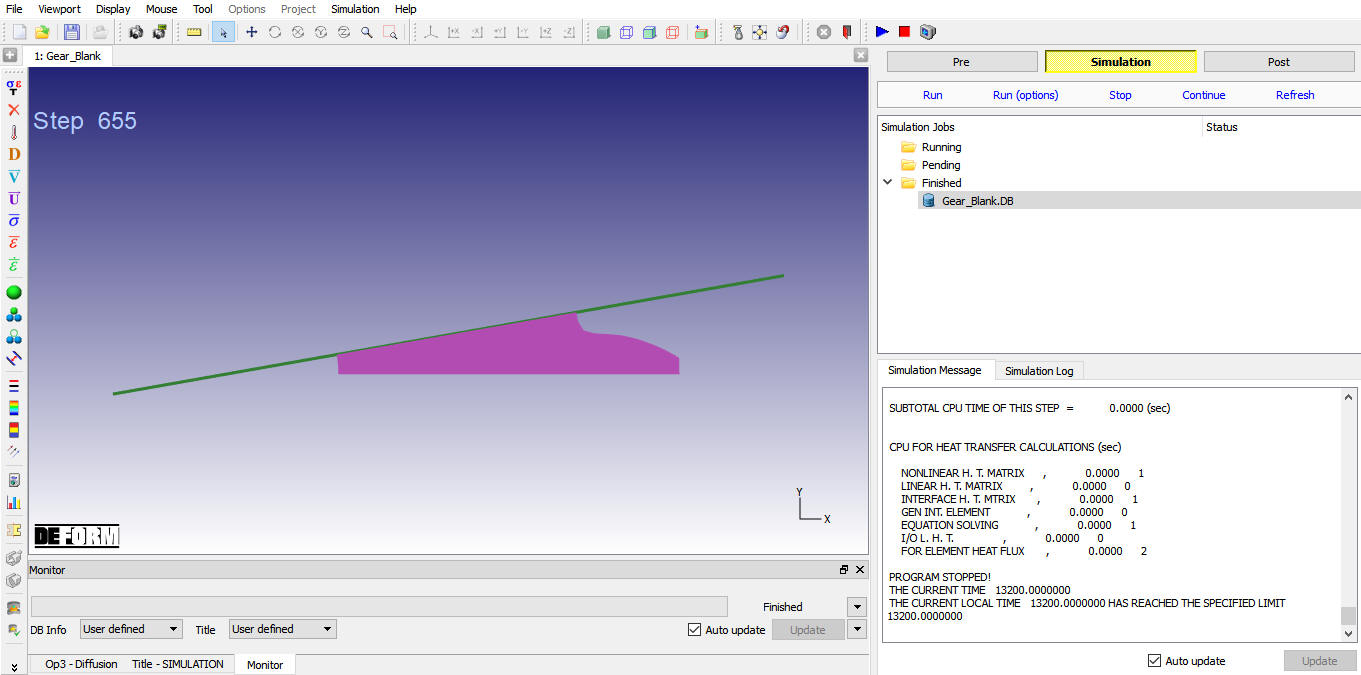
Simulation Message tab
Post-Processing the Results
After simulation has been completed, switch to ![]() tab to view results, MO post processor will open.
tab to view results, MO post processor will open.
The key state variable in this simulation is the Dominant Atom. Go to the last step of the database. Click the State Variables ![]() button to open the state variable dialog. Select the variable Dominant Atom under Diffusion and plot the variable as a shaded contour. Click on
button to open the state variable dialog. Select the variable Dominant Atom under Diffusion and plot the variable as a shaded contour. Click on![]() (see Fig. 2DHTML3.7.). The user should see the variable in the similar state as in the end of the Carburization operation. In this simulation, the total amount of carbon holds constant but diffuses throughout the geartooth.
(see Fig. 2DHTML3.7.). The user should see the variable in the similar state as in the end of the Carburization operation. In this simulation, the total amount of carbon holds constant but diffuses throughout the geartooth.

Diffusion Dominant atom plot
After completion of Post processing, Save the Project and close the MO wizard by clicking Quit ![]() button or selecting Quit option under File menu. If User wants to continue the setup, can switch to pre mode directly and continue the setup by adding operation.
button or selecting Quit option under File menu. If User wants to continue the setup, can switch to pre mode directly and continue the setup by adding operation.
Related Topics: